
教你搭建自己的 blessing-skin 皮肤站并使用高大上的 authlib-injector 外置登录
很可惜,并未骗到绿宝石。
撰写本文时考虑的是全新服务器,并尽可能简略,未说明各个命令的用途,有时间写一篇新的。
本文撰写于 2020 年 7 月 4 日,其信息很可能已过期。
想搭建自己的皮肤站并使用高大上的 authlib-injector 外置登录吗?
本文以 blessing-skin-server 4.4 与 authlib-injector 配合 Centos 7 + nginx 进行演示。
因为发稿前 blessing-skin-server 5.0 仍未发布正式版。
所需材料:
一台有公网的服务器,需要支持 Nginx 或者 Apache ,支持 PHP7.2 以上。
1.服务器购买
如果你已经有服务器了,请跳过此步骤。
你的服务器需要有公网,并且能支持 nginx 或者 apache ,支持 PHP7.2 以上。
如果你的年龄小于24岁,可以到 阿里云 腾讯云 华为云 购买到一台每个月10元左右的学生服务器,配置通常在 1 核心 2G 内存。
阿里云:https://promotion.aliyun.com/ntms/act/campus2018.html
腾讯云:https://cloud.tencent.com/act/campus
华为云:https://developer.huaweicloud.com/campus
请注意,如果你的服务器在中国大陆且要使用域名,那么是需要进行备案的。
我这里使用一台 阿里云的轻量应用服务器,安装 Centos7 系统进行演示,因为上面的学生机一般都提供 Centos7。
购买完成后记好你的 IP 地址和密码。
2.使用SSH连接到服务器
这里你需要一款 SSH 工具,用于连接到服务器。
我这里用的是 finalshell,这款工具可以很方便的管理服务器上的文件。
下载地址:https://www.hostbuf.com/t/988.html
打开以后如下图:

主机那里填入你从服务商那里拿到的 IP,如果服务商没有说明的话,端口就是22。
认证方式,如果给你的是密码的话就填密码,是秘钥就填私钥。
用户名:国内的一般都直接给你 root ,本教程都默认使用 root 账户进行。
密码:按照服务商给的填。

3.安装环境
链接到服务器后,先输入下面的命令

yum install screen#安装 screen,因为 ali 的系统没有预装
screen -S lnmp#创建一个叫 lnmp 的窗口,防止 ssh 意外断开等
wget http://soft.vpser.net/lnmp/lnmp1.7.tar.gz -cO lnmp1.7.tar.gz && tar zxf lnmp1.7.tar.gz && cd lnmp1.7 && ./install.sh lnmp#运行 lnmp 一键脚本,这会直接帮你装完大部分环境
You have 11 options for your DataBase install.
1: Install MySQL 5.1.73                                                                                              |
2: Install MySQL 5.5.62 (Default)                                                                                    |
3: Install MySQL 5.6.48                                                                                              |
4: Install MySQL 5.7.30                                                                                              |
5: Install MySQL 8.0.20                                                                                              |
6: Install MariaDB 5.5.68                                                                                            |
7: Install MariaDB 10.1.45                                                                                           |
8: Install MariaDB 10.2.32                                                                                           |
9: Install MariaDB 10.3.23                                                                                           |
10: Install MariaDB 10.4.13                                                                                          |
0: DO NOT Install MySQL/MariaDB                                                                                      |
Enter your choice (1, 2, 3, 4, 5, 6, 7, 8, 9, 10 or 0): 5                                                            |
You will install MySQL 8.0.20                                                                                        |
===========================                                                                                          |
Please setup root password of MySQL.
Please enter: mysql
MySQL root password: mysql
===========================
Do you want to enable or disable the InnoDB Storage Engine?
Default enable,Enter your choice [Y/n]: y
No input,The InnoDB Storage Engine will enable.
===========================
You have 9 options for your PHP install.
1: Install PHP 5.2.17
2: Install PHP 5.3.29
3: Install PHP 5.4.45
4: Install PHP 5.5.38
5: Install PHP 5.6.40 (Default)
6: Install PHP 7.0.33
7: Install PHP 7.1.33
8: Install PHP 7.2.31
9: Install PHP 7.3.19
10: Install PHP 7.4.7
Enter your choice (1, 2, 3, 4, 5, 6, 7, 8, 9, 10): 9
You will install PHP 7.3.19
===========================
You have 3 options for your Memory Allocator install.
1: Don't install Memory Allocator. (Default)
2: Install Jemalloc
3: Install TCMalloc
Enter your choice (1, 2 or 3): 2
#mysql 版本可以自选,安装MySQL 5.6或5.7及MariaDB 10必须1G以上内存,更高版本至少要2G内存。
#php跟着我选,blessskin4.0 不支持 php 7.4,但至少需要php 7.2。安装PHP 7及以上版本必须1G以上内存。
#其他选项跟着我选就好了
选完以后就可以去玩游戏了,因为一般的机器配置较差,需要编译很长时间很长时间,比如一小时什么的。
============================== Check install ==============================
Checking ...
Nginx: OK
Error: MySQL install failed.
PHP: OK
PHP-FPM: OK
Sorry, Failed to install LNMP!
Please visit https://bbs.vpser.net/forum-25-1.html feedback errors and logs.
You can download /root/lnmp-install.log from your server,and upload lnmp-install.log to LNMP Forum.
#这里我选了 mysql 8 但是因为配置不足或是某些原因,安装失败了
./install.sh重新运行安装脚本
这一次选 mysql 5.7
Install lnmp takes 69 minutes.
Install lnmp V1.7 completed! enjoy it.
如果你看到这个,那么说明 lnmp 我们已经安装完成了,脚本应该会自动退出,如果没有的话 请按 Ctrl+C
4.安装blessing skin
首先我们到 https://github.com/bs-community/blessing-skin-server/releases 下载你想要的版本

这里我们下载 blessing-skin-server-4.4.0.zip
接着
mkdir /home/wwwroot/blessskin
cd /home/wwwroot/blessskin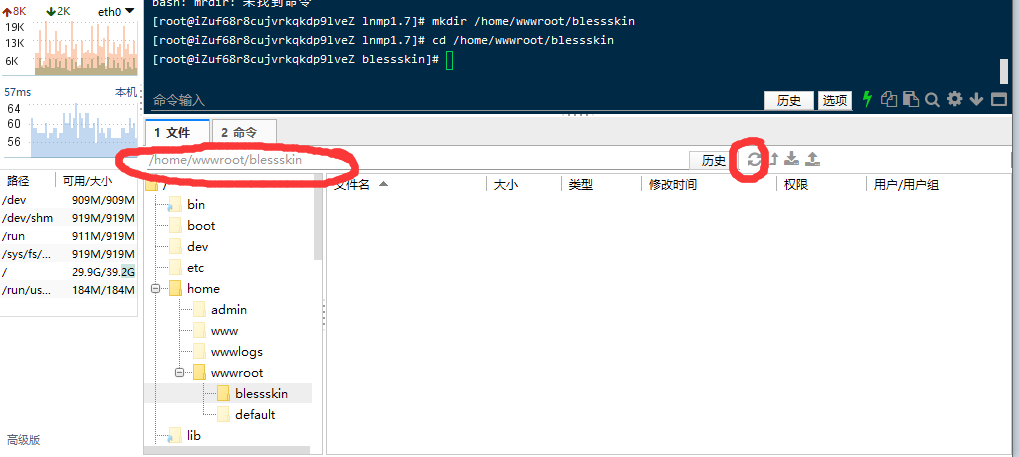
确保你的路径是这样的,然后把你下好的 blessing-skin-server-4.4.0.zip 拖进空白的地方,等待上传完毕
上传完毕之后
unzip blessing-skin-server-4.4.0.zip
chown -R www:www *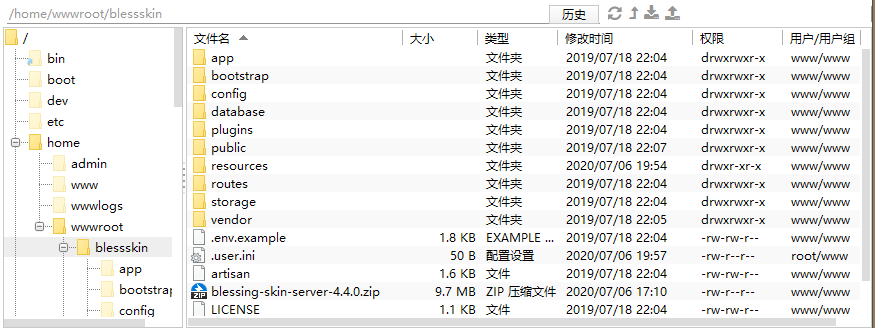
然后右键空白的地方新建文件 名字叫 .user.ini 新建后双击打开

在里面写
open_basedir=/home/wwwroot/blessskin/:/tmp/:/proc/然后点击文件按钮 点击保存
cd /usr/local/nginx/conf
在下面的文件里面找到 fastcgi.conf 双击打开
在最后两行前面加上#
fastcgi_param  SCRIPT_FILENAME    $document_root$fastcgi_script_name;
fastcgi_param  QUERY_STRING       $query_string;
fastcgi_param  REQUEST_METHOD     $request_method;
fastcgi_param  CONTENT_TYPE       $content_type;
fastcgi_param  CONTENT_LENGTH     $content_length;

fastcgi_param  SCRIPT_NAME        $fastcgi_script_name;
fastcgi_param  REQUEST_URI        $request_uri;
fastcgi_param  DOCUMENT_URI       $document_uri;
fastcgi_param  DOCUMENT_ROOT      $document_root;
fastcgi_param  SERVER_PROTOCOL    $server_protocol;
fastcgi_param  REQUEST_SCHEME     $scheme;
fastcgi_param  HTTPS              $https if_not_empty;

fastcgi_param  GATEWAY_INTERFACE  CGI/1.1;
fastcgi_param  SERVER_SOFTWARE    nginx/$nginx_version;

fastcgi_param  REMOTE_ADDR        $remote_addr;
fastcgi_param  REMOTE_PORT        $remote_port;
fastcgi_param  SERVER_ADDR        $server_addr;
fastcgi_param  SERVER_PORT        $server_port;
fastcgi_param  SERVER_NAME        $server_name;

# PHP only, required if PHP was built with --enable-force-cgi-redirect
fastcgi_param  REDIRECT_STATUS    200;
#fastcgi_param PHP_ADMIN_VALUE "open_basedir=$document_root/:/tmp/:/proc/";
#fastcgi_param PHP_ADMIN_VALUE "open_basedir=$document_root/:/tmp/:/proc/";
保存后 双击 nginx.conf 打开,把原来的内容全部删掉,改成下面的
user  www www;

worker_processes auto;
worker_cpu_affinity auto;

error_log  /home/wwwlogs/nginx_error.log  crit;

pid        /usr/local/nginx/logs/nginx.pid;

#Specifies the value for maximum file descriptors that can be opened by this process.
worker_rlimit_nofile 51200;

events
    {
        use epoll;
        worker_connections 51200;
        multi_accept on;
        accept_mutex on;
    }

http
    {
        include       mime.types;
        sendfile on;
        tcp_nopush on;
        keepalive_timeout 60;
        tcp_nodelay on;
        gzip on;
        #limit_conn_zone $binary_remote_addr zone=perip:10m;
        ##If enable limit_conn_zone,add "limit_conn perip 10;" to server section.

        server_tokens off;
        access_log off;

server
    {
        #listen 443 ssl http2;
        listen 80;
        server_name localhost 你的域名;
        index index.html index.htm index.php default.html default.htm default.php;
        root  /home/wwwroot/blessskin/public;

        #ssl_protocols TLSv1.2 TLSv1.3;
        #ssl_ciphers TLS-CHACHA20-POLY1305-SHA256:TLS-AES-256-GCM-SHA384:TLS-AES-128-GCM-SHA256:HIGH:!aNULL:!MD5;

        #ssl_certificate 你的证书路径;
        #ssl_certificate_key 你的证书秘钥路径;
        #ssl_dhparam ;

        #add_header Strict-Transport-Security "max-age=63072000; includeSubdomains; preload" always;
        #开启HSTS,并设置有效期为“63072000秒”(2年),包括子域名(根据情况可删掉),预加载到浏览器缓存(根据情况可删掉)

        add_header X-Frame-Options SAMEORIGIN;
        add_header X-Content-Type-Options nosniff;
        #ssl_prefer_server_ciphers on;
        #ssl_session_cache builtin:1000 shared:SSL:10m;
        #ssl_session_tickets on;
        #ssl_session_timeout 10m;

        add_header Referrer-Policy no-referrer always;


        include rewrite/other.conf;


location / {
    try_files $uri $uri/ /index.php?$query_string;
}

location ~ /\. { deny all; }


        include enable-php-pathinfo.conf;

        location ~ .*\.(gif|jpg|jpeg|bmp|swf|ico)$
        {
            expires      30d;
        }

        location ~ .*\.(js|css)?$
        {
            expires      12h;
        }

        location ~ /.well-known {
            allow all;
        }

        location ~ /\.
        {
            deny all;
        }
   }

}
把 你的域名 换成你的域名,或者直接删掉使用IP访问
有关于 https 加密访问的部分我都注释掉了,要使用的时候把#删掉,填入对应的东西即可
然后输入下面的命令重启 nginx 和 php
nginx -s reload
service php-fpm restart
5.设置数据库
mysql -uroot -p你的密码注意 -u -p后面没有空格,直接填写
这时候你的界面会出现
mysql>
这时候输入下面的内容
create DATABASE blessskin;

CREATE USER 'blessskin'@'localhost' IDENTIFIED BY 'skin';

GRANT ALL ON blessskin.* TO 'blessskin'@'localhost';

quit
意思是创建一个叫 blessskin 的数据库,创建一个叫 blessskin 的本地用户密码是 skin,然后给 blessskin 用户 blessskin 数据库的全部权限
6.设置Blessing Skin
现在访问服务商给你的 IP,就能看到下面的界面

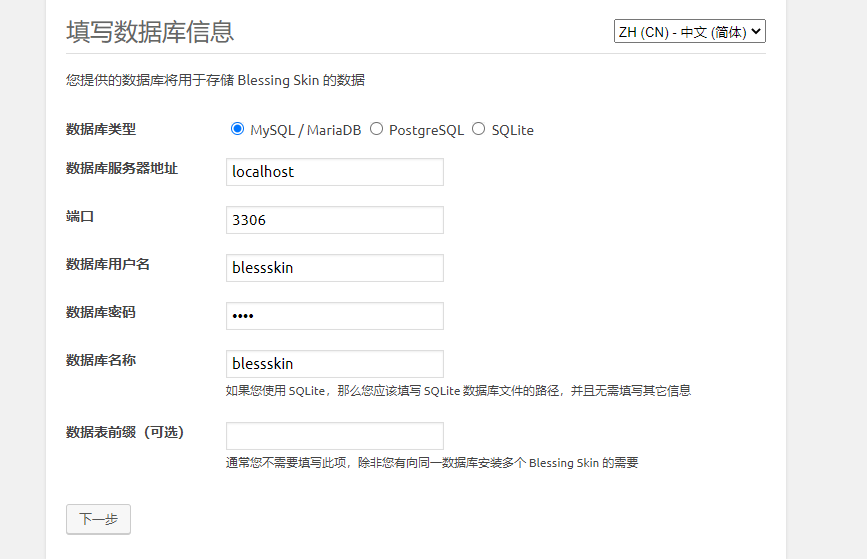
由于上面我们设置了数据库,所以在这里填入
数据库用户名:blessskin
数据库密码:skin
数据库名称:blessskin
下一步填写你的邮箱密码昵称,稍后用这些登录Blessing Skin
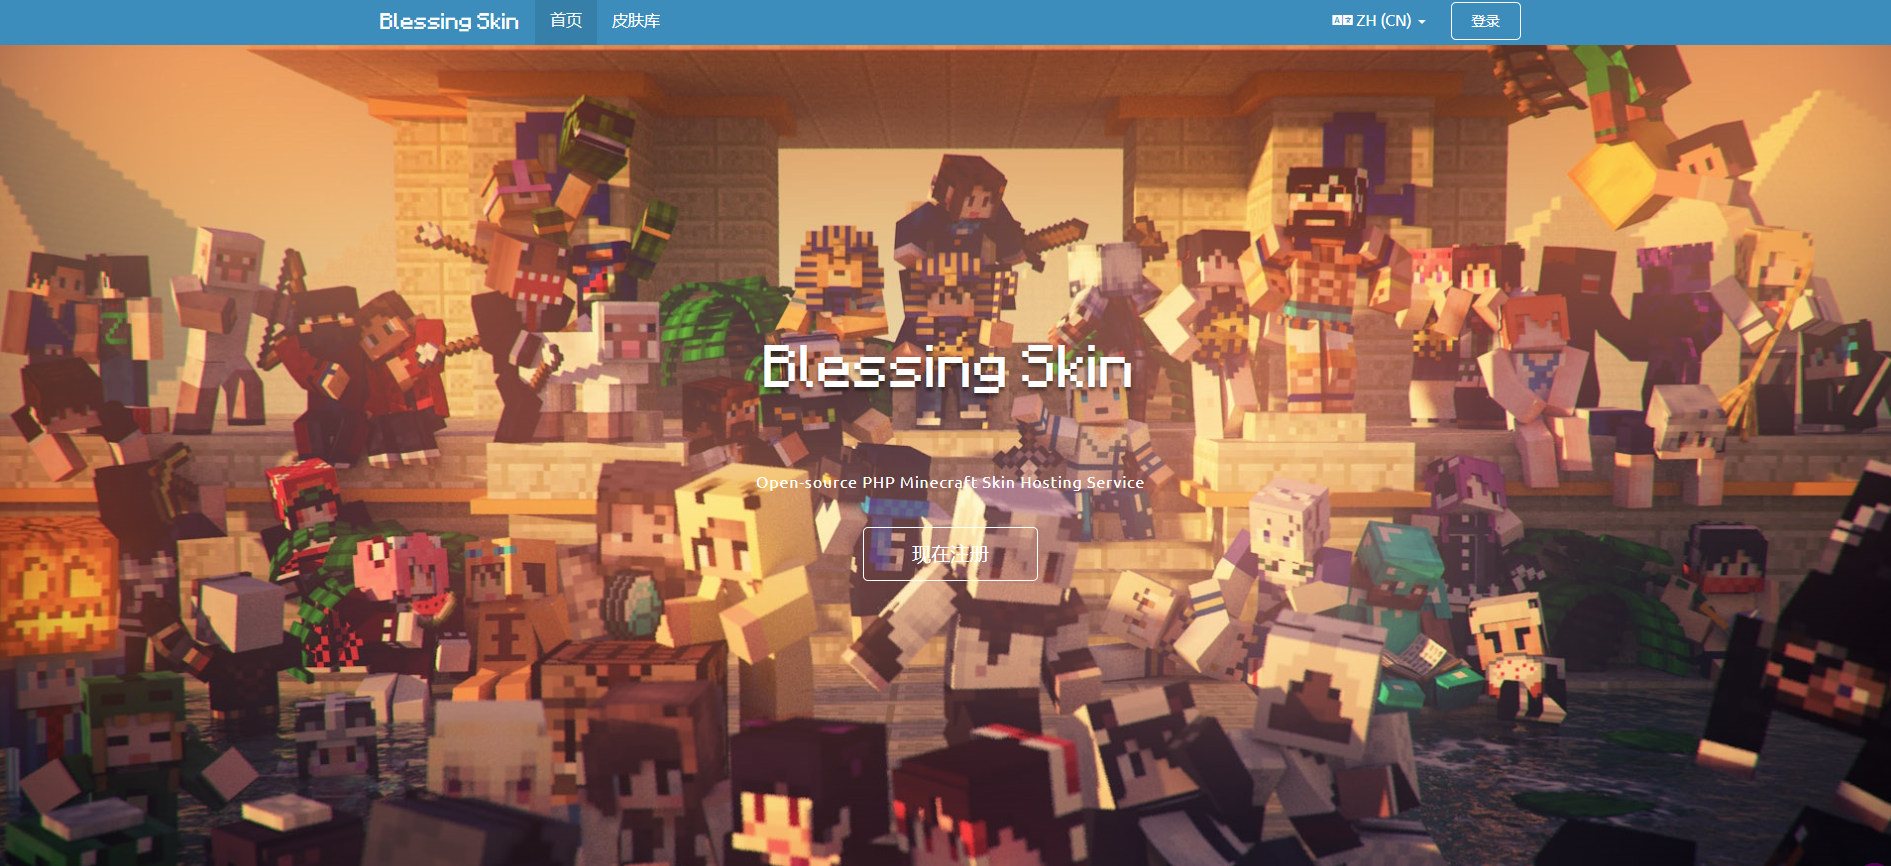
至此,你的 Blessing Skin 皮肤站就安装完成了
7.安装yggdrasil API
打开管理面板,在插件市场中找到 yggdrasil API 安装并启用。

然后打开插件设置,记好 你的Yggdrasil API地址
8.配置你的服务端
在您的原有服务端启动参数的 -jar 前面加上 -javaagent:authlib-injector.jar=你的Yggdrasil API地址
例如你原来的服务端启动参数是这样的
java -Xmx1024M -Xms1024M -jar minecraft_server.1.12.2.jar nogui那么应该修改成这样
java -Xmx1024M -Xms1024M -javaagent:authlib-injector.jar=你的Yggdrasil API地址 -jar minecraft_server.1.12.2.jar nogui在 server.properties 里面把 online-mode 改成 true,就像这样 online-mode=true
启动后您的服务端应该就只能通过皮肤站验证登录了
9.配置你的客户端
以HCML 3为例,添加账户,登录方式选择 authlib-injector ,然后点添加认证服务器,地址写上 你的Yggdrasil API地址 ,用户名是你的皮肤站邮箱,密码是你的皮肤站密码

*此图片摘自官方
如果没有什么意外,你的皮肤站+外置登录就这样配置好了。
无评论